Thursday, June 23, 2011

My Kiddie Coaster.

Having been out of school for just over a year now, I can tell you...it only gets better.

Starting into the creative industry, specifically interior design, in such a tough market and competitive field made for no easy feat. When I realized I was going to be taking a unique path into freelance work, I ran with the opportunity...and I haven't stopped runnin yet.

Starting small, of course, I have started in on projects here and there. Set design and painting, commissioned artwork, commercial Christmas decorations, wedding styling, and interior projects. Whatever I can get my hands on. As I've settled into a part time job with Calico Corners, learning the ropes of custom furnishings, window treatments, and fabrics, I found myself wondering if there was more I should be doing. With ambitious goals in mind, I needed affirmation that starting small, developing a portfolio, and getting whatever experience I could was just what I needed to do to jump-start my career...

After reading some encouraging words in a post on HGTV's blog...I encourage you to read it here...I realized I'm right where I am meant to be right now and doing exactly what I need to be doing...right now. There's a fun little rollercoaster in most career fields that you sort of have to bust into in order to ride. Any hiring companies out there seek experience...you can't get the experience until you've had a job...which loops you right back to not being able to find a job until you get that experience...are you wanting to hurl your corndog yet? Right.

Well a year later, I'm here to tell you there's hope. There may be other coasters in
the park that you've got to ride before you can graduate to the Titan or the Superman...or in my case, the Scooby ride, because, to be honest, I'm terrified of roller coasters...but I digress....there's HOPE. There may be something about summer but one referral from a friend has led to another and to another. One successful painting has led to another and another. And as I type this, gates have flown open for me and opportunities to ride my own coasters have come at me left and right.

This isn't meant to be boastful, nor is it meant to depress those with no work...but it IS meant to encourage you to be confident in your abilities, create your own opportunities, and ride some kiddie rides until you bust into those big kid coasters.

"The people who get on in this world are the people who get up and look for the circumstances they want, and if they can't find them...they MAKE them." -George Bernard Shaw

I wrote about being encouraged and uplifted by these great words back in October and I still keep them at the back of my mind on a day to day basis. It's only gotten better since then, not always easier, but definitely better and I wouldn't trade what I've learned for any kind of routine job. I've got my own roller coasters to ride first. Someday I'll make it to the Titan but for now? I'm havin the time of my life.

Monday, May 30, 2011

Locker Labor of Love.

One thing my client wanted in her little Aiden's new sports room was a locker for both fun decor and good storage. Welp here's how I made that happen for her...

FIRST. Get your parents to hi-jack a couple lockers from a local high school locker room...
But really. New lockers can be pretty pricey and I was going for a more vintage look...and was on a budget. So having a local HS that just remodeled their athletic facility was a giant plus! Getting them detached was a feat but it was well worth the money saved! You can also check for your local school district's surplus warehouses...they often only open to the public occasionally but can have some great finds too!

SECOND. Scrub a Dub.
Cleaning was a bit of a pain as there was some rust, some bends, and lots and lots of dust. But in order to get a good cover, a well executed scrub down is crucial! An air compressor is really handy at this stage! Use some pliers to bend back any misshapen areas as sheet metal is pretty malleable!

THIRD. Take it all apart.
Not really...okay but kinda...since we detached the lockers from a string of others, I needed to re construct a couple areas. By that I mean turning the side panels inside out and upside down to have a more finished look and no jagged edges...

FOURTH. Paint the town red!
...or the locker blue. Whatever floats your boat. I used a Rustoleum paint as it is great for most surfaces, especially metal and has good coverage. Drying between coats is big for even cover so you can actually see where more is needed. This took about 2-3 coats in most areas. Be sure to cover hardware or remove hooks or anything you may not want painted. And don't forget the nooks and crannies! ...but seriously. No one likes an unpainted cranny.

FIFTH. the sunshine phase.
Let the sun do its work...let this thing dry and come back to it the next day or at least a few hours later for that final coat of evenness. If you have globs or drips anywhere, use a razor very lightly to get em off and then touch up that spot with a couple sprays. I used about 4 cans of paint on this piece.

SIXTH. Do your thing Honey!
Install Install Install! Although it's simple to put a big locker in a room, something that is really important is safety! They may not be overly heavy but they are sharp, metal and pretty large. Use the holes at the back of the lockers to anchor this into the wall. Find a stud and put a screw nail through there. Even just one is enough to prevent anyone from yankin this sucker down on them. If you can't find a stud, be sure to put an anchor in because just nailing it to the wall will NOT do the trick!

And VOILA! A fun and inexpensive project, made with love...and some elbow grease.

Monday, May 23, 2011

A Home Run Room.

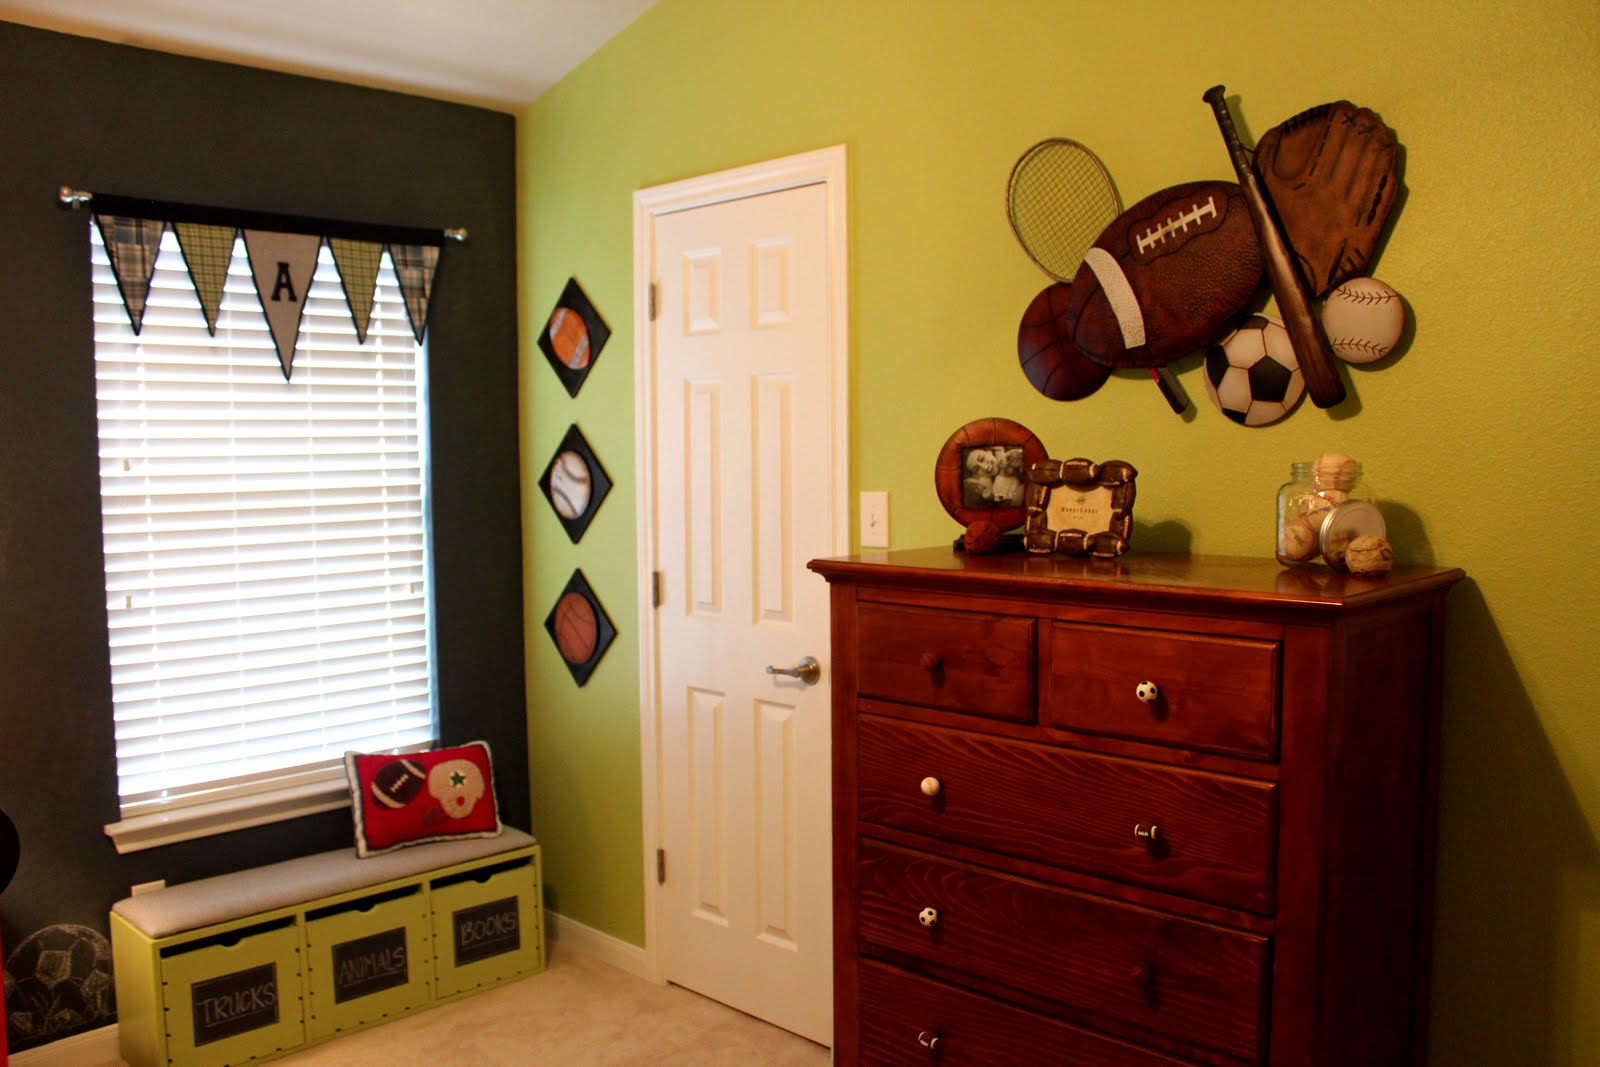
A bit over a month ago, I started working with a new client! For a girl startin off her freelance design career, this was and IS a huge deal and great joy for me! Little Aiden just turned 3 and is transitioning from baby to toddler to his little boy years so his room was ready for a complete revamp! After expressing her wants for a chalkboard wall, some lockers and a sports theme, I presented some concept ideas to Natalie (Mom) for a playful vintage sports inspired room!


After hours of work and DIY and internet research and bargain hunting and contractor's quotes and feeding of my new found Etsy addiction, I have completed Aiden's room! My first full room project for a referred client, I am overjoyed to see that the process they taught us all about in school....WORKS!

Concept to completion and this space is for sure a room for champs!


Here's a peak into some of the little moments created throughout this little guys room...


Storage is a challenge for all parents. I turned this once vertical shelving unit horizontally to create a organized storage system with an upholstered top for seating and chalkboard fronts for personalized organizing!

This business is all about networking, and luckily my network of friends works in my favor! One of my best friends, Lyndi (creator of Sew Bee It from an earlier post) created this perfect pennant valance for the small window.

Can't find what you want? Create it yourself. I painted this baseball clock in an effort to get just what I wanted with a wooden plate and a clock kit. Easy. Shout out to my grandpa who makes these awesome wooden names and happened to have an "Aiden".

Natalie first fell for this Pottery Barn bedding in the catalog and there really just wasn't any beating it. It's fun, energetic, a lil vintage and has a ton of great texture.

Some refinished lockers hijacked from an old high school locker room make for great storage and fun decor. Obviously.

The green wall color (Melange Green from Sherwin Williams) was pulled from the PB quilt and the chalkboard paint is "So Stone" from Hudson Paints where you can find any color chalkboard paint you could ever want!

A hand-painted mural by yours truly completes and compliments the little guys fun and energetic new sporty space. What a fun project this has been.

Details on some "How-To" elements coming soon!

Monday, May 9, 2011

Only a Bill on Capitol Hill.

Anyone else been keeping up with all the action the profession of Interior Design is gettin down in that peninsula state of Florida? Well they've been hit hard by people who just don't get it. Not understanding a profession is one thing but ignorance by choice and arrogance is a ridiculous game for grown adults to be playing.

House passed a bill called "Deregulation of Professions and Occupations" or House Bill 5005 and ASID members of Florida and many other states have been fighting tooth and neck to ensure this bill did NOT pass Senate. With interior design being one of the professions to be deregulated in the state of Florida, they assumed this would be beneficial...giving more people a chance to explore the world of design and make that leap from merely a decorator to a designer without laws and restrictions.

Pssshtt. What this would really do is actually detrimental and had it passed, could have affected the careers of designers in many more states. Regulation allows designers to practice commercial design and work on projects with building codes, LEED potential and really get their hands on some of those big markets in hospitality, health, education facilities and other spaces. These designers able to practice are licensed professionals who have worked hard, taken exams and achieved and maintained this status themselves, meaning no one should be able to take it away from them.

Last Friday, the bill for deregulation in Florida was defeated by an incredible 32-6 Senate vote. While this is a celebrated victory, that does not mean the profession won't continue to be a target for those wishing to simplify professions they may simply not understand.

Just because I don't understand medicine, does not mean I plan to take your MD away. Licensing is a great honor and show of commitment to a field that these people are passionate about. Hopeful to become a licensed designer and even a LEED AP myself, I plan to support the continued efforts to push away opposition and encourage understanding of the importance of regulation. The profession of Interior Design depends on it.

Sunday, May 1, 2011

Get BLEEPin.

Yes. Our 3rd issue of BLEEP was just released as the clock struck midnight into this first day of May. This May/June issue is chalk full of EVERYTHING.

From food reviews and suggestions...

to a Travel feature on the places you won't wanna miss out on...
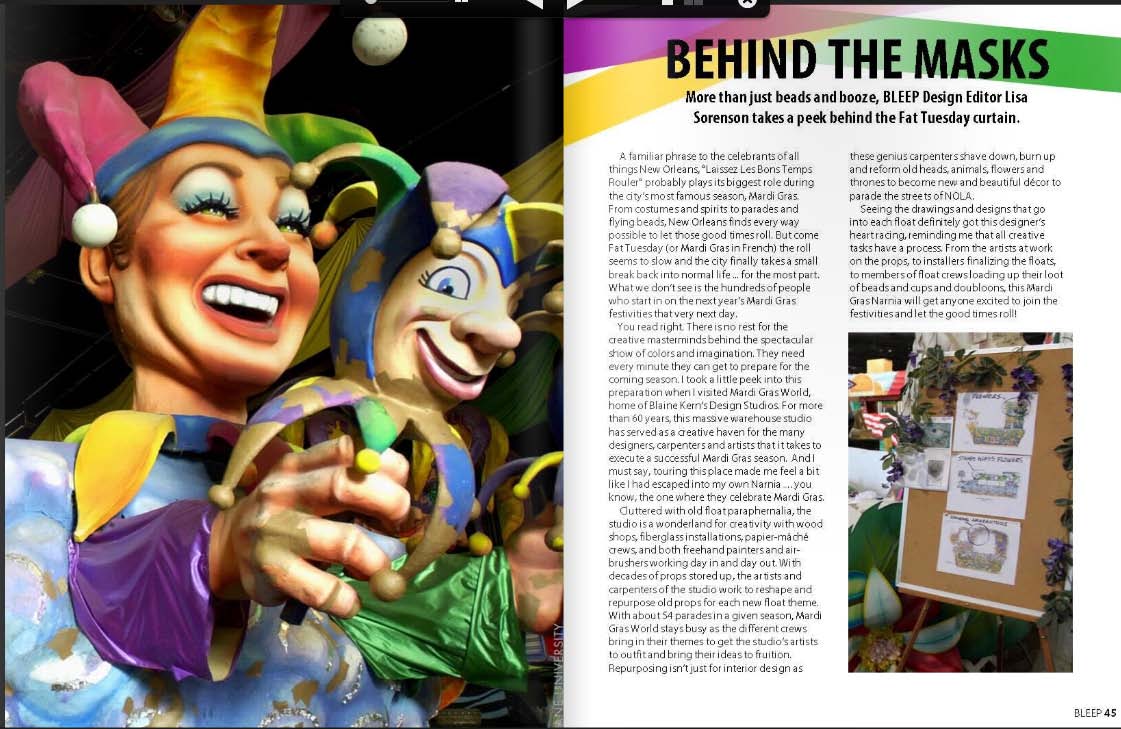
to my own behind the scenes take on the design masters of Mardi Gras...
to interviews with professionals in the theater and performance careers, incredible photography and graphic editing features and even a photo essay of readers' cell-phone-captured moments...

if there isn't something to get your creative and cultural juices flowing...well then something's wrong with your juices...OR...you need to become a contributor and have your own work seen in the next BLEEPmag!

Seriously. Get BLEEPin.

Tuesday, April 26, 2011

Atchafellatcha...

While on my most recent trip to New Orleans (yes. my family is obsessed with this city therefore I do blog about it a lot), we found this incredible restaurant. A true taste of New Orleans, Atchafalaya offers incredible Cajun food with both indoor and street side dining in its quaint uptown location.

With flawless weather and incredible eats out on the patio, this bistro had our family lovin every minute. But the real treat came when I went inside. Once a house, the floorplan had been converted into a bar area and several different dining rooms throughout.

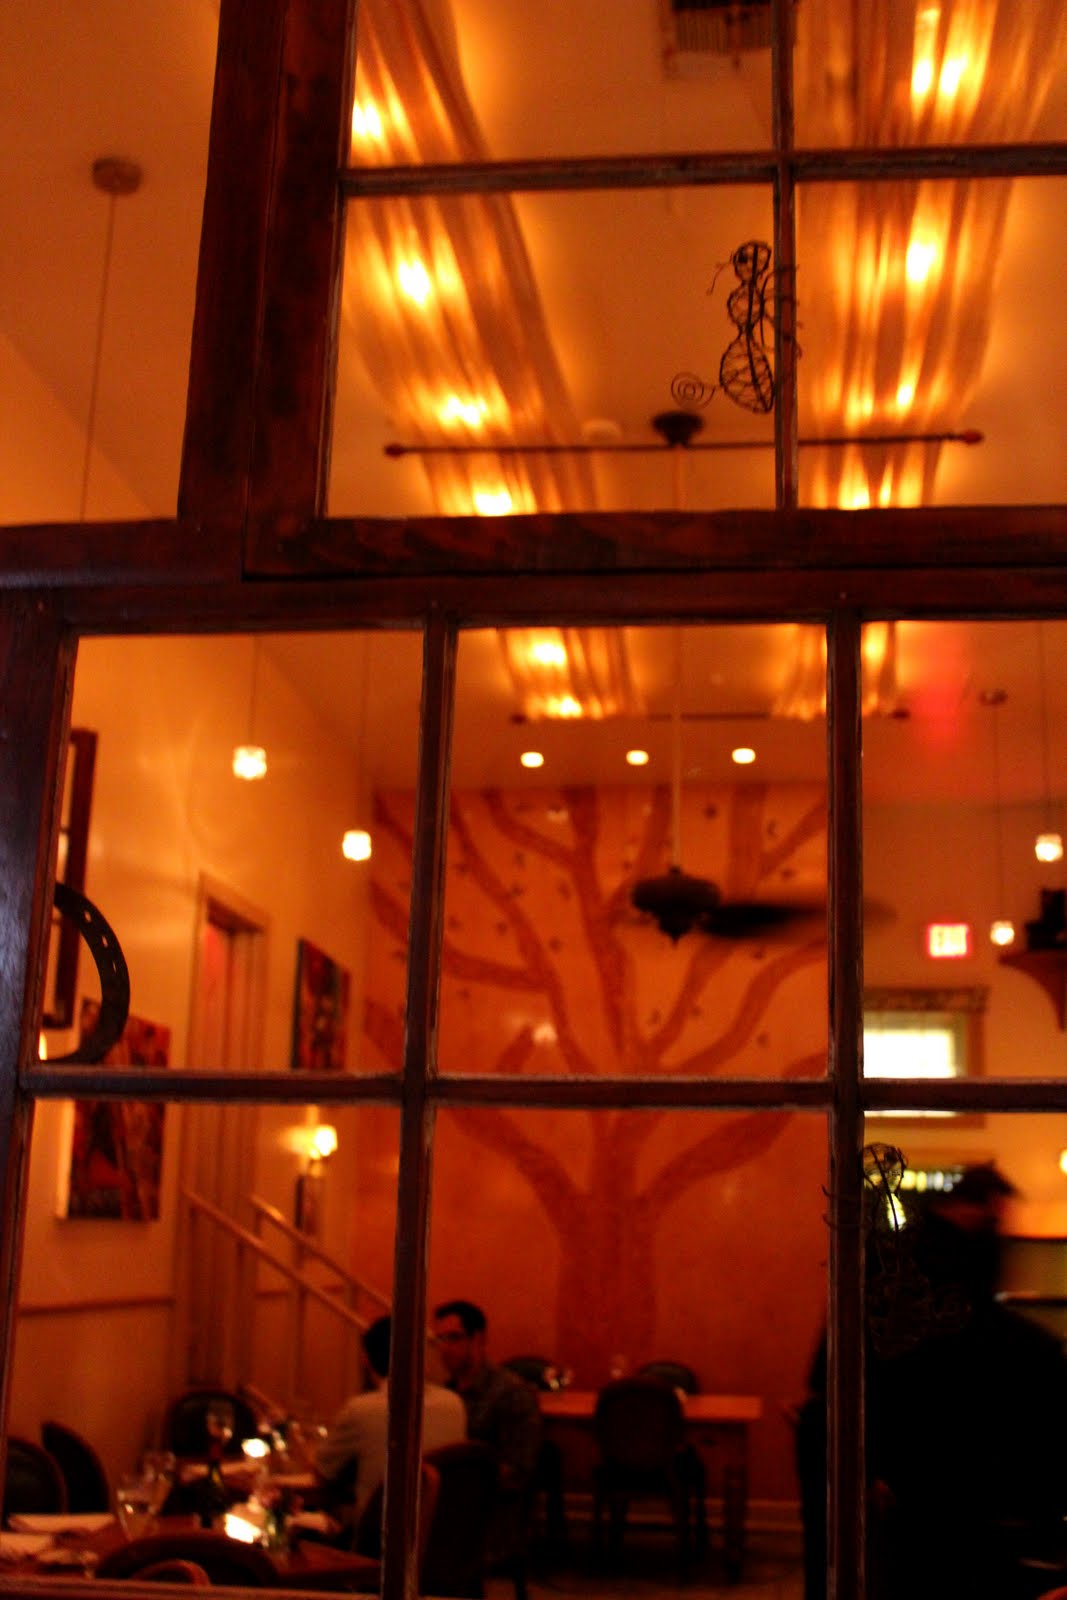
The house and it's many spaces were not the only thing re-purposed though. From the hostess station and bar, you are greeted with a by a well of windows. Taken by the impressiveness of both the artistry and space planning functionality of the windows, I asked our waitress about them and she referred me to the owner.

He told me how the windows were all reclaimed from houses affected by Katrina. The windows create a work of art symbolizing new life and renewed hope. Beyond this window wall, at the end of the dining room, is seen a tree. Carved into a wall of wood, this tree has awkward limbs and dismembered branches but is looked upon with beauty in an effort to represent hope for those affected by this disaster.

A good design is one thing. Upcycling, reusing, repurposing, creating beautiful things out of nothing. That's all part of being a good, thoughtful, creative designer. But designing with a story. That is a whole other game. That is something I will forever strive to be. A designer seeking her story in each space. In each project. Always reflecting others and overflowing a hopeful joy into each and every client, in the hopes of affecting them with my designs.

Sappy designer dreams aside, I also am brought great joy by my dad's continuous inability to say "Atchafalaya"....his closest so far has been "Atchafellatcha"... Always good for a laugh, that dad.

Wednesday, March 30, 2011

Painting My Life Away...the Recap.

Finally, the pictures have been sifted through and edited and I am ready to share with you my art work from SING 2011! To learn more about this check out my post, Whoda Thunk, where I talked about getting this awesome opportunity to work with so many people and groups at my own home, Baylor University!

From sketches to CAD (computer aided drafting) work to renderings to painting these monstrosities, it is quite the experience and is all worth it when you finally see the group perform. From costumes to choreography to singing to props, my backdrops were just one supporting actor in the grand scheme but it still feels great to continue to be a part of it!

Here's some recap!Starting with some rough sketches, the group tells me what they like and I take it to AutoCAD to ensure accuracy in perspective and proportion...
Next is the full color rendered drawing. This is done on an 11x17" bristol and drawn to a scale of 1/2"=2 feet on the actual backdrop! Crazy!
This particular one ended up with some seriously longgg days (most of them did but this one had a couple exceptionally long and in closed quarters with high chemical concentrated paint...) These finished backdrops are about 26 feet tall and 56 feet long! Whew.
__________________

This group had some troubles too when the warehouse we were using was attacked by a monsoon! What a mess when half of a nearly finished backdrop gets soaked...like watching paint dry...oh wait...__________________

As the last group I worked with, I faced the least difficulty with this one! Simple, bright, and fun, I was able to finish in a shorter period than with any other!___________________

I set myself up for stress with this design...lines lines LINES everywhere. By the end, the boys were even saying "Ohp. Lisa's got her ruler again...watch out"...but I conquered. I did.__________________

This was the first backdrop I completed early on in the process and I actually painted this one in a BACKYARD! Have to admit I missed the grass when it came to my poor knees on unending concrete...but I did not miss the freezing cold and the outdoor weather uncertainty! Survived!___________________

I began work with this group late in the overall SING process so they had already done a design of sorts. I ended up redrawing it to my preferred scale before painting but haven't gone back to render it yet. These guys REALLY challenged me with wanting the stands to be filled with audience members and when I proposed black and white to add to the 1920's nitty gritt of their act, they said "we trust you"! Scary words!...in the end I did it and was very pleased with the results on both the frontdrop and the backdrop!


Hopefully this fun adventure will add some interest to my portfolio and it has already opened up doors in the painting world as I just completed some commissioned art work for a nursery!
Doors keep a openin and I'll keep a creatin!