Umm hi.
Have you check out the latest issue of BLEEP yet?
We had over 1000 readers with our last one and hope to trump that this time.
Get inspired. Read BLEEP Magazine.

 Luckily, my client had found this blog posting about how to recreate this stencil and it ended up being a LOT of help. Check it out here. I bought blank stencil sheets and invested in a heated stencil cutter at Micheal's as well. This tool took some practice to master as it melts the plastic to cut it, making it easy to botch the design. Be patient with it and be prepared with back up stencil sheets (mylar).
 I scaled out the design and made a CAD elevation drawing of the wall as it has a large window making for some difficult planning on scale and repeat of the stencil. From the elevation I determined I would make my stencil fit a 10" by 15" sheet. After printing the design (on 2 sheets to fit) I lined them up and traced it onto the mylar with a sharpie.
 Then I used the fancy burner tool to cut out the design...
 They had already done the base coat of Benjamin Moore's Iced Lavender and I took the Pearlized White to to the stencil.
 While the level was mentioned in the directions on that blog, I canNOT stress the need for the level enough. Every time I took up the stencil and taped it back down, I put the level up to ensure all the scallops run perfectly vertical.
 As the stencil was used at least 75 times on this one wall, the paint really caked up on it so I did a lot of freehand touch-up with a 1/4" paintbrush to ensure they really did look consistent.
 Those windows were pretty tricky but patience was key and I love how much it looks like wallpaper!
 With a happy client, I am pleased to say that my first venture into stenciling and having to stay within an actual restricted line (my stencil) turned out quite successfully! I can't wait for them to send me pictures with all their furnishings and the lil tot herself, Olivia!
 While cubbie units like this are not hard to come by, it's what I did with it that is. A vertical unit is fine...if you've got the space...but I realized (after what was probably too long of a head-tilted-stare in this aisle) that I could repurpose this piece horizontally to meet all my needs! So here's how I did it!
 With the whole piece primed out, I had a 1/4" piece of plywood cut to just smaller than the dimensions of the new top to become the upholstered surface for the seating aspect. From there we marked 6 spots to drill holes to match up from the wood to the base.
 Something called a T-nut was then used so that a screw could be drilled up threw the base into the top but not interfere with the smooth, cushion of the upholstered seat. T-nuts became my best friends. What a perfect find!
 After the wholes where drilled with everything in the right spot, the more attractive green coat was applied to the pieces. The crevices are tricky and you HAVE to watch for goopy drips because those are just ugly...and I don't do ugly. Also make sure the first coat dries before you try to apply a second coat to ensure that 2nd one covers nicely.
 To upholster the top, I wrapped a nice 1" thick foam piece over the top and staple gunned that in nice and taught. The next layer was a broadcloth material...if you don't want to buy any (even though its super cheap), you can use an old sheet and it works just as well. With that layer taught down, you have a better chance of getting any pattern on your finish fabric lined up and you'll use less of that decorative fabric as it won't have to work to stretch over anything.
 After the piece was said and done, I added an accent of my chalkboard paint to the front of the drawers. I gave it 3 coats, taped off with painters tape, and it left a great, smooth surface to personalize the drawers with chalk for even better organization!
 Now the room has a one-of-a-kind DIY storage bench. A perfect spot for this little tyke to sit and play and to clean up when he's done!
 experience until you've had a job...which loops you right back to not being able to find a job until you get that experience...are you wanting to hurl your corndog yet? Right.
 But really. New lockers can be pretty pricey and I was going for a more vintage look...and was on a budget. So having a local HS that just remodeled their athletic facility was a giant plus! Getting them detached was a feat but it was well worth the money saved! You can also check for your local school district's surplus warehouses...they often only open to the public occasionally but can have some great finds too!


 This business is all about networking, and luckily my network of friends works in my favor! One of my best friends, Lyndi (creator of Sew Bee It from an earlier post) created this perfect pennant valance for the small window.
 Can't find what you want? Create it yourself. I painted this baseball clock in an effort to get just what I wanted with a wooden plate and a clock kit. Easy. Shout out to my grandpa who makes these awesome wooden names and happened to have an "Aiden".
 Natalie first fell for this Pottery Barn bedding in the catalog and there really just wasn't any beating it. It's fun, energetic, a lil vintage and has a ton of great texture.
 Some refinished lockers hijacked from an old high school locker room make for great storage and fun decor. Obviously.
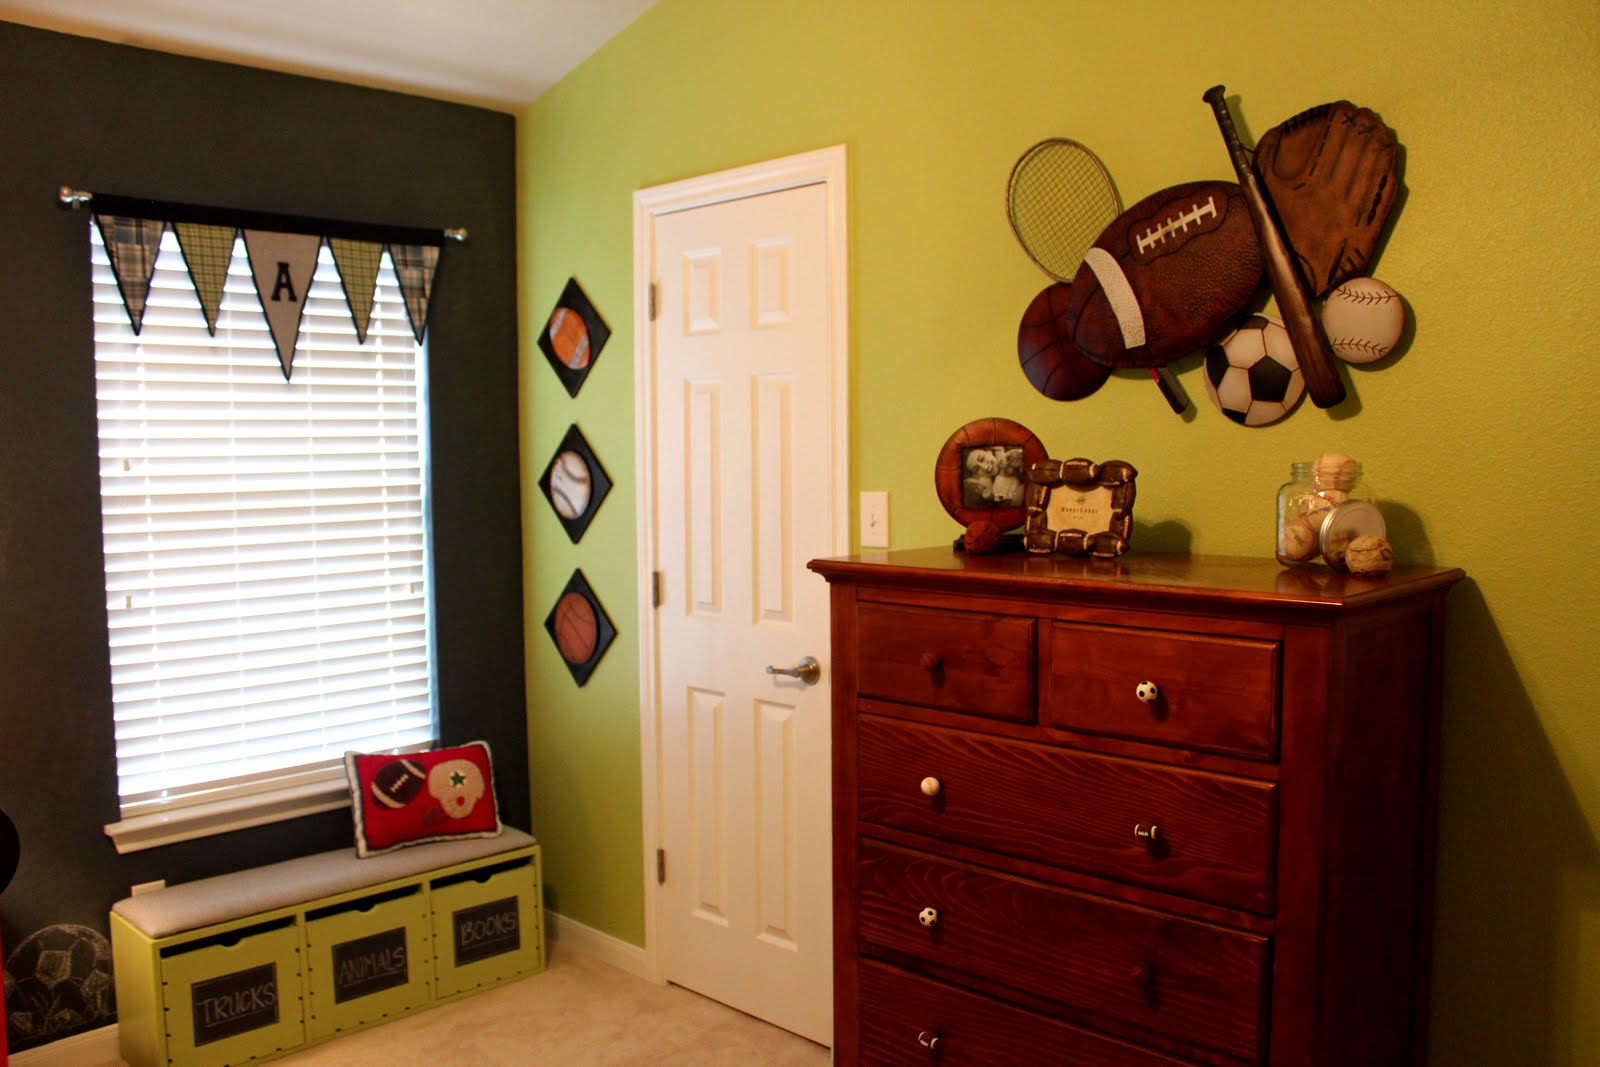 The green wall color (Melange Green from Sherwin Williams) was pulled from the PB quilt and the chalkboard paint is "So Stone" from Hudson Paints where you can find any color chalkboard paint you could ever want!
 A hand-painted mural by yours truly completes and compliments the little guys fun and energetic new sporty space. What a fun project this has been.
 Yes. Our 3rd issue of BLEEP was just released as the clock struck midnight into this first day of May. This May/June issue is chalk full of EVERYTHING.

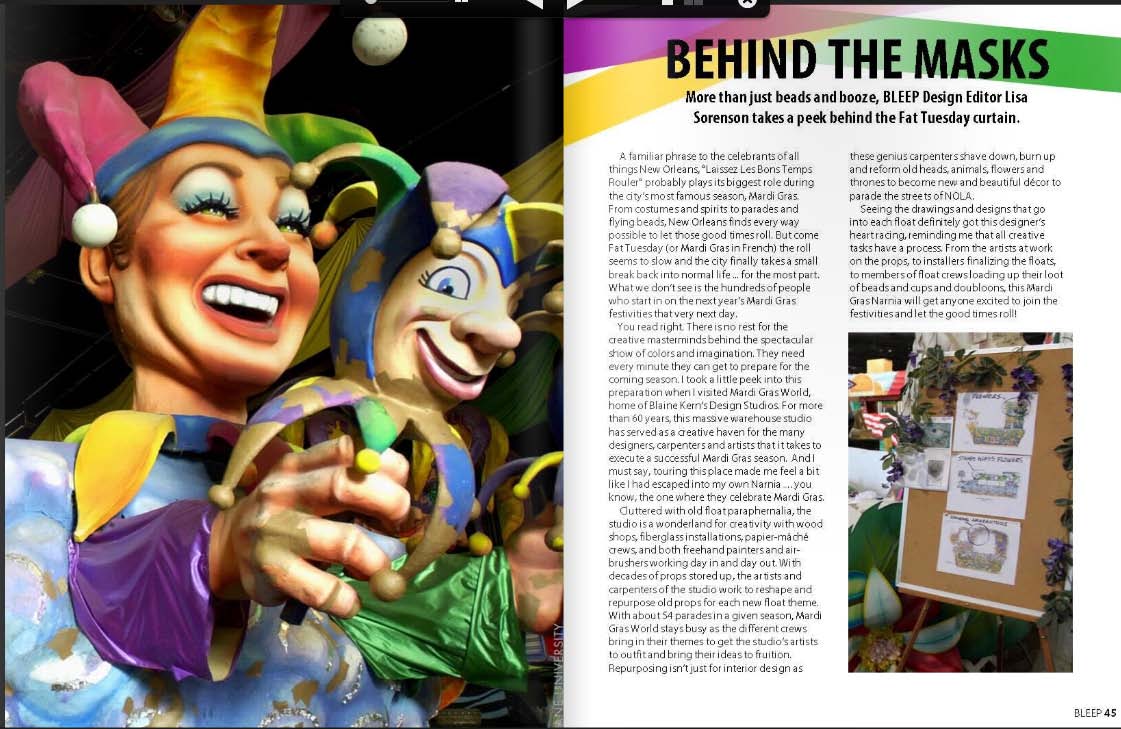
 While on my most recent trip to New Orleans (yes. my family is obsessed with this city therefore I do blog about it a lot), we found this incredible restaurant. A true taste of New Orleans, Atchafalaya offers incredible Cajun food with both indoor and street side dining in its quaint uptown location.
 he only thing re-purposed though. From the hostess station and bar, you are greeted with a by a well of windows. Taken by the impressiveness of both the artistry and space planning functionality of the windows, I asked our waitress about them and she referred me to the owner.
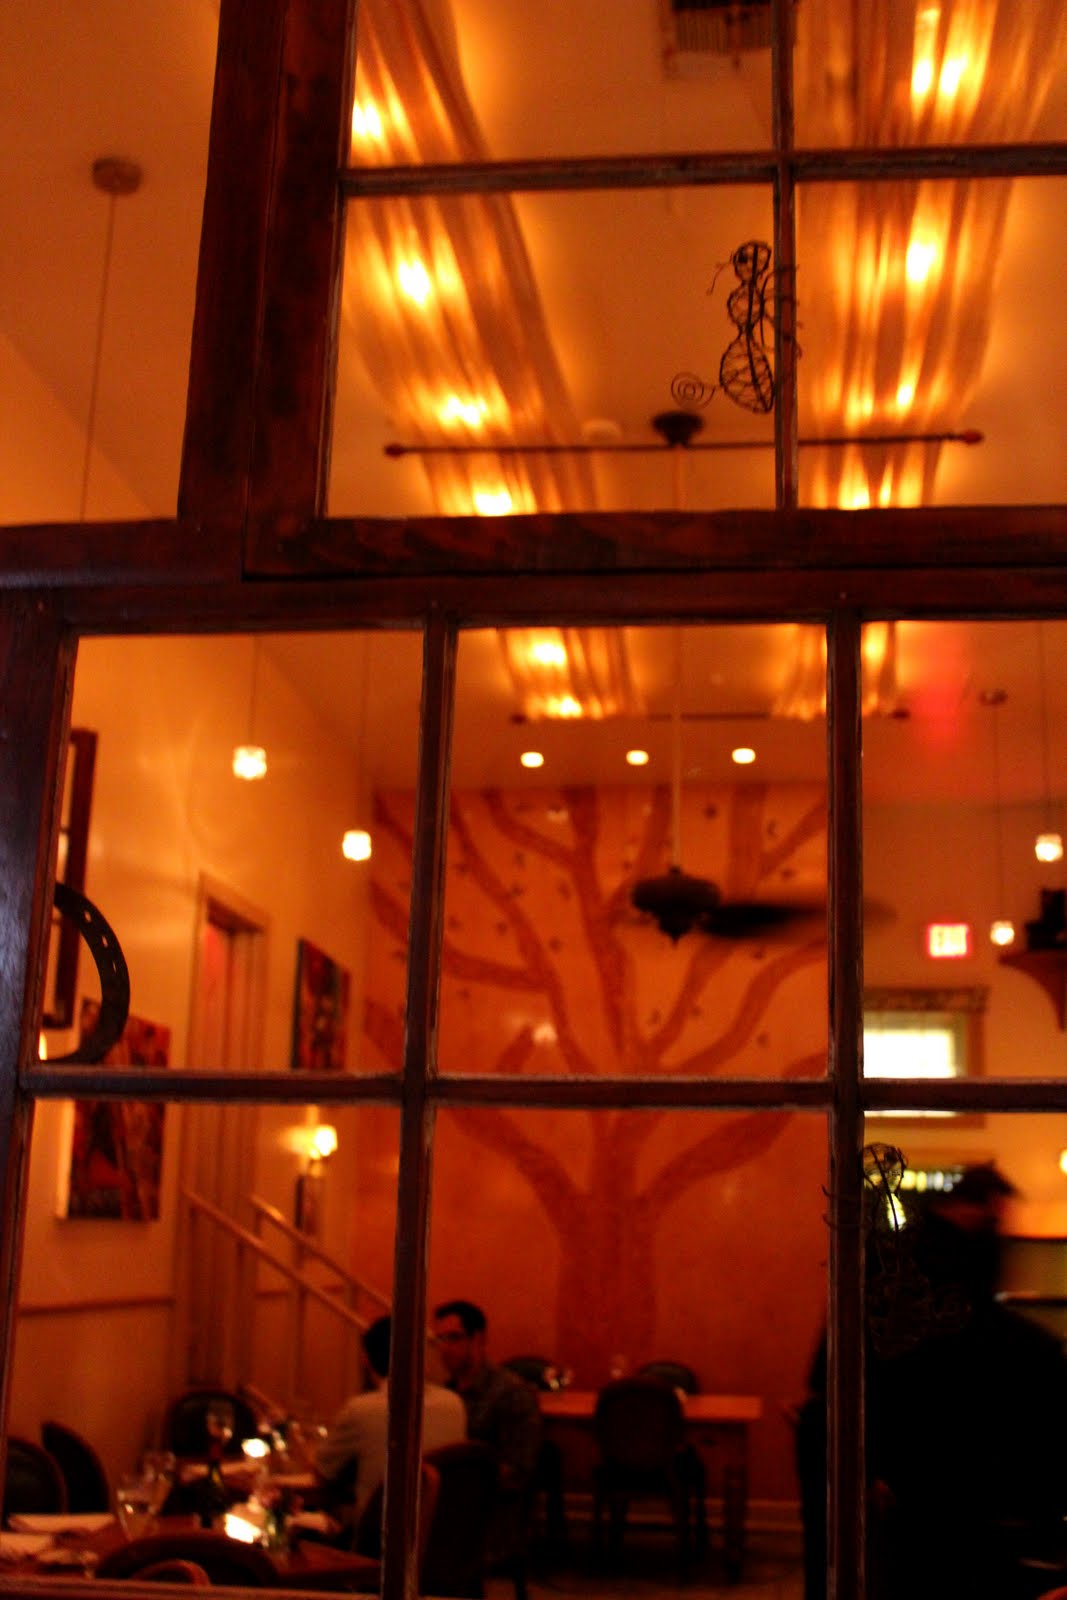
 Starting with some rough sketches, the group tells me what they like and I take it to AutoCAD to ensure accuracy in perspective and proportion...
 Next is the full color rendered drawing. This is done on an 11x17" bristol and drawn to a scale of 1/2"=2 feet on the actual backdrop! Crazy!
 This particular one ended up with some seriously longgg days (most of them did but this one had a couple exceptionally long and in closed quarters with high chemical concentrated paint...) These finished backdrops are about 26 feet tall and 56 feet long! Whew.
 __________________
 ___________________
 __________________
 ___________________
